Make a music video from your own song
Your music, the people in it from your own photos, and your idea in a line or your own script. Seven steps, with the real screens. Planning and editing are free; nothing costs credits until you press a button that shows a price.
1Start a music video
- Sign in at reveriemovies.com. On Your Projects, click Music video. (With no projects yet, it’s the link “Have a song? Make its music video”.)
- If it’s your first visit, the welcome screen asks where you’re starting: choose “I have a song and want a music video”.
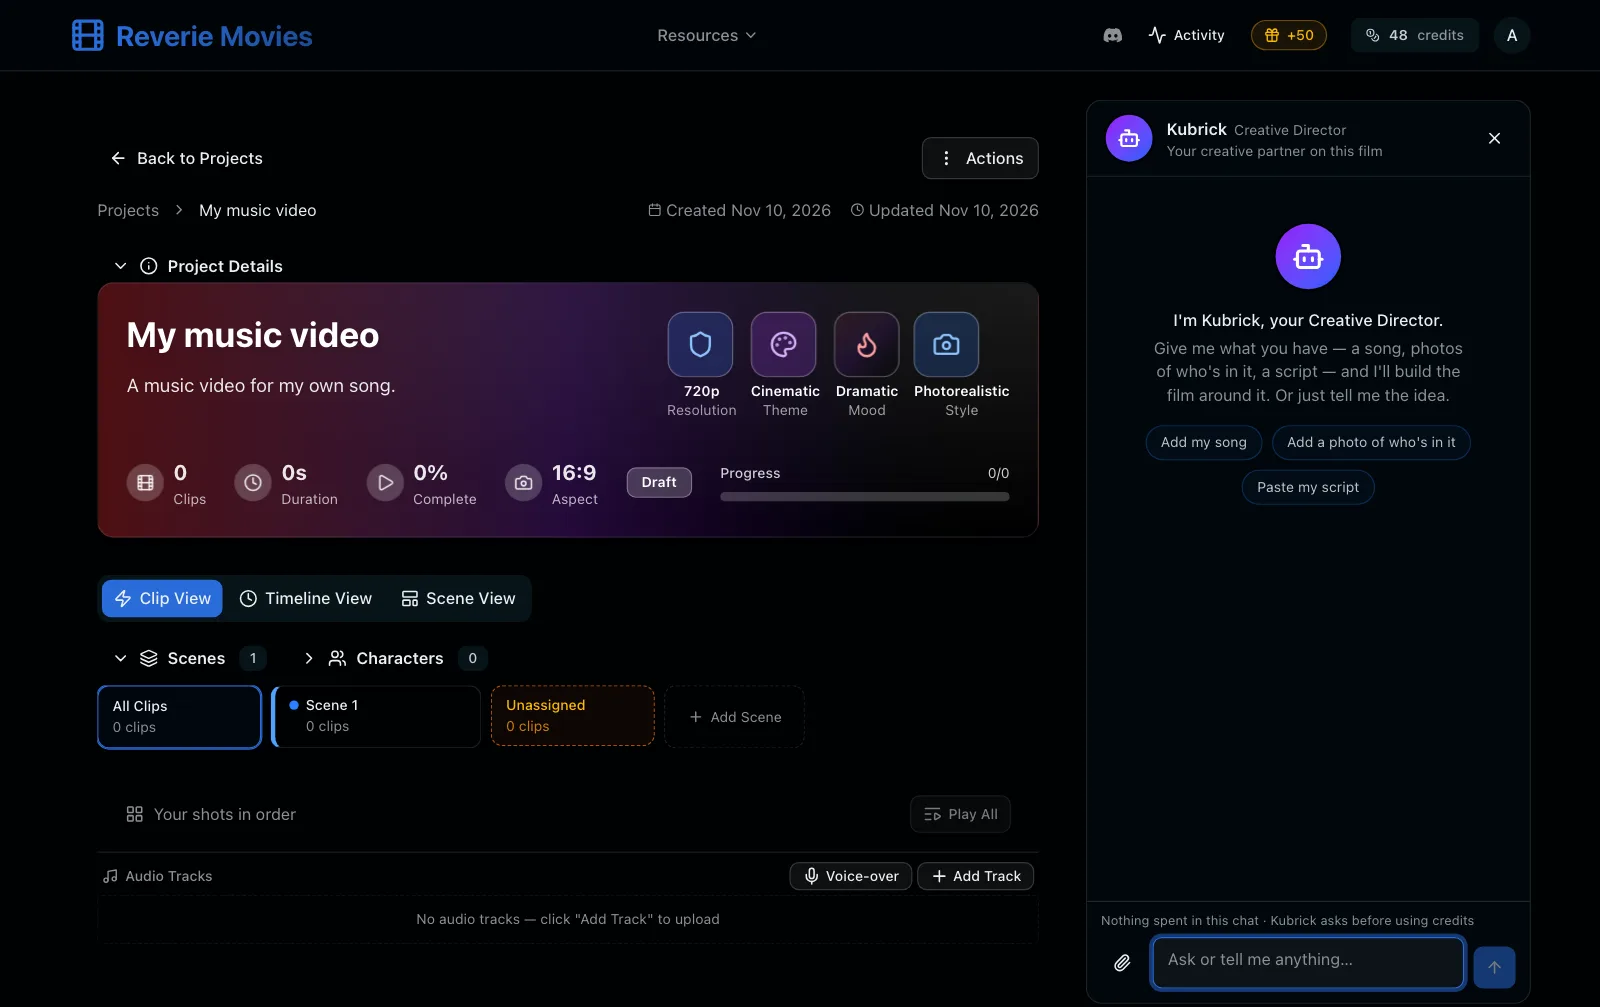
- A new project opens with Kubrick, the assistant, ready for what you have.
It starts widescreen (16:9). For Reels, TikTok or Shorts, tell Kubrick “Make this project 9:16” before any shots are made.
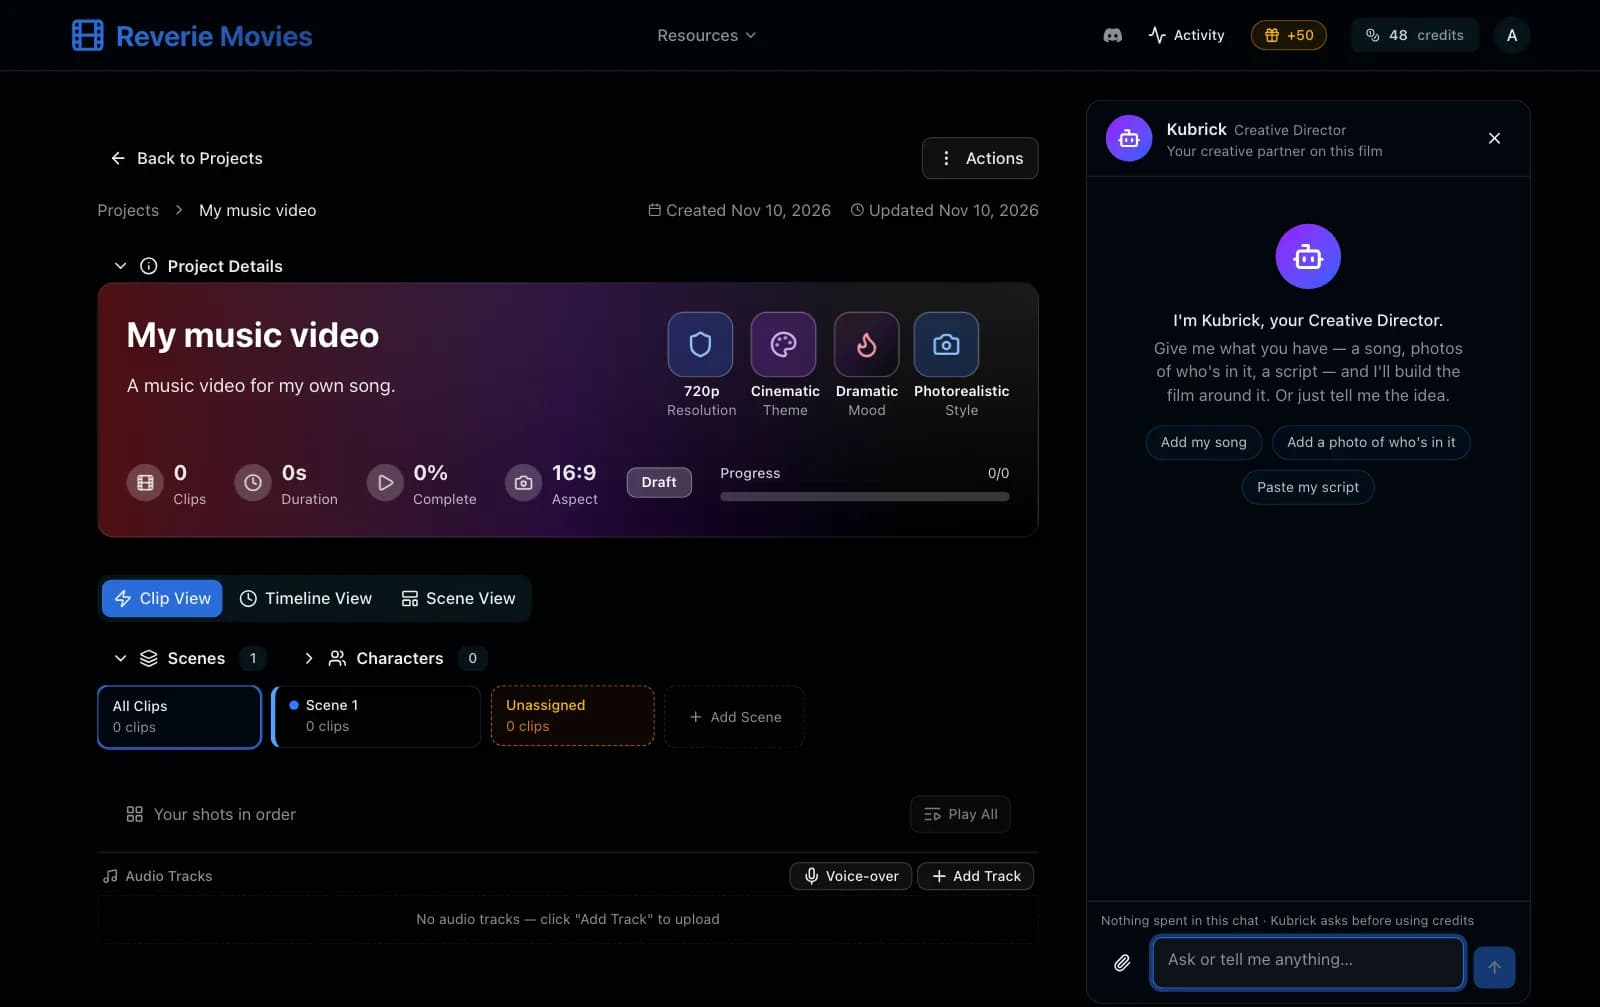
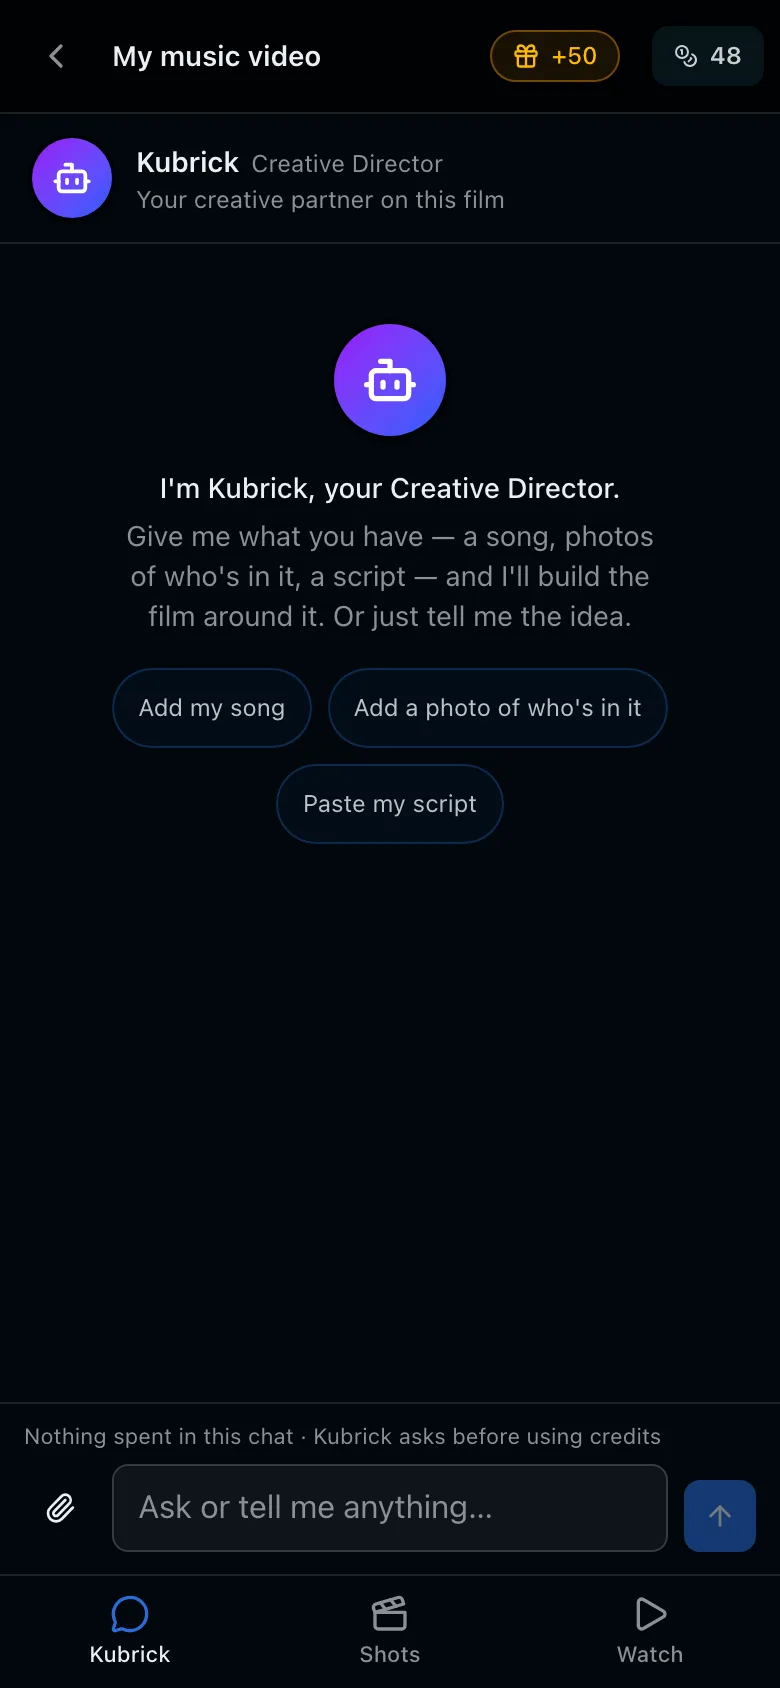
A new music video project. Kubrick asks for your song, who’s in it, and your script. 2Add your song
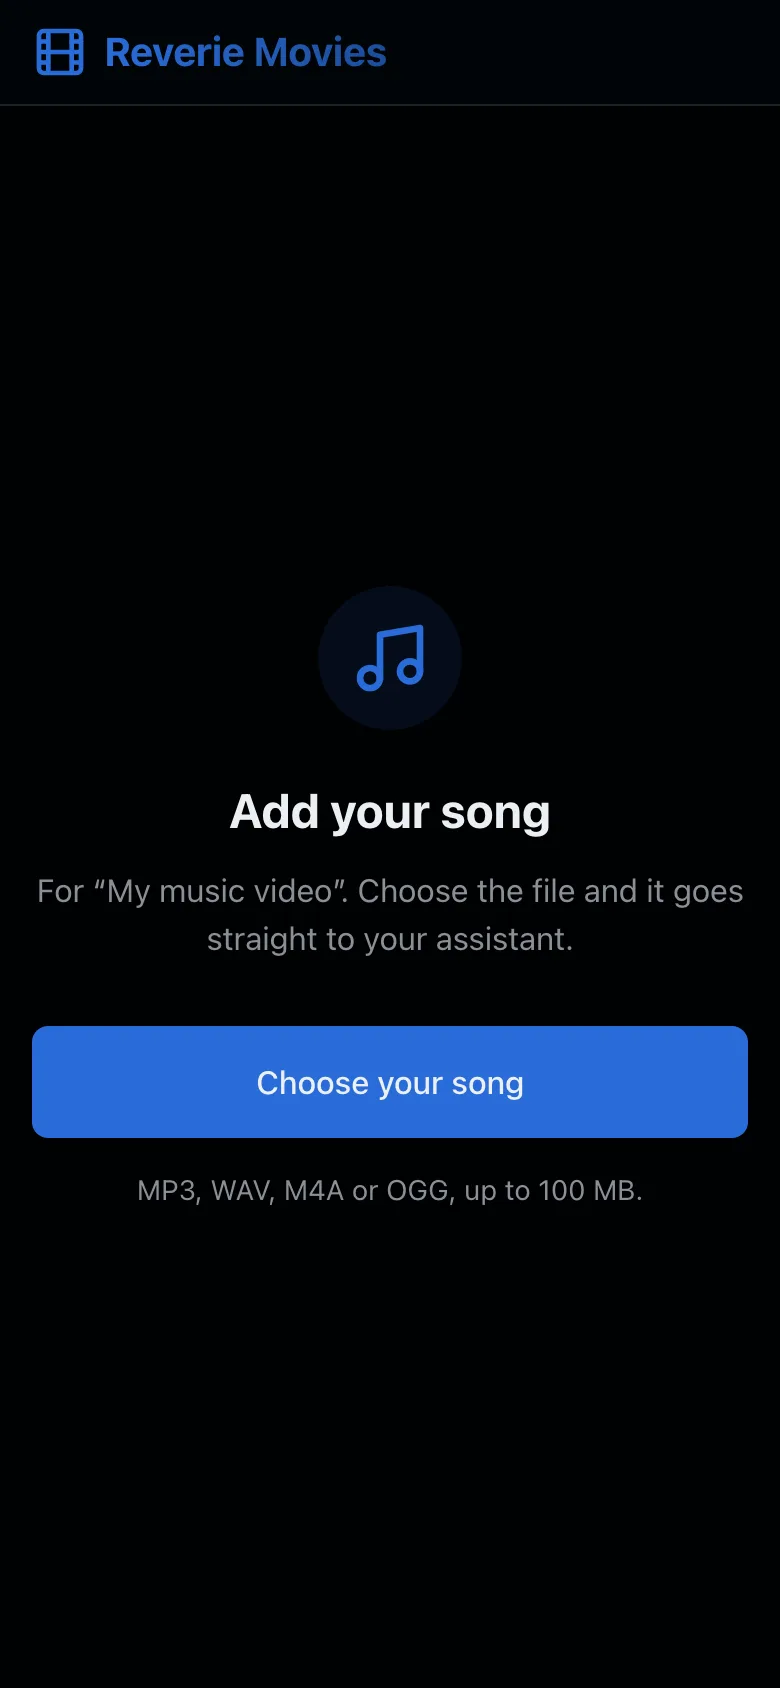
- Click Add my song and choose the file: MP3, WAV, M4A or OGG, up to 100 MB.
- Press send. Kubrick puts it on the timeline as the film’s track, and the film becomes the song’s length. The project takes the song’s name.
- He listens to it, and tells you its tempo and where it lifts and drops: he uses them to plan the scenes and to put the cuts on the beat.
3Add the people in it, from your photos
For privacy, Reverie draws everyone it generates as a stylised, unrecognisable person, unless you say a photo is of you or of someone who agreed to appear. So say whose photo it is.
- Click the paperclip and choose a clear, front-facing photo.
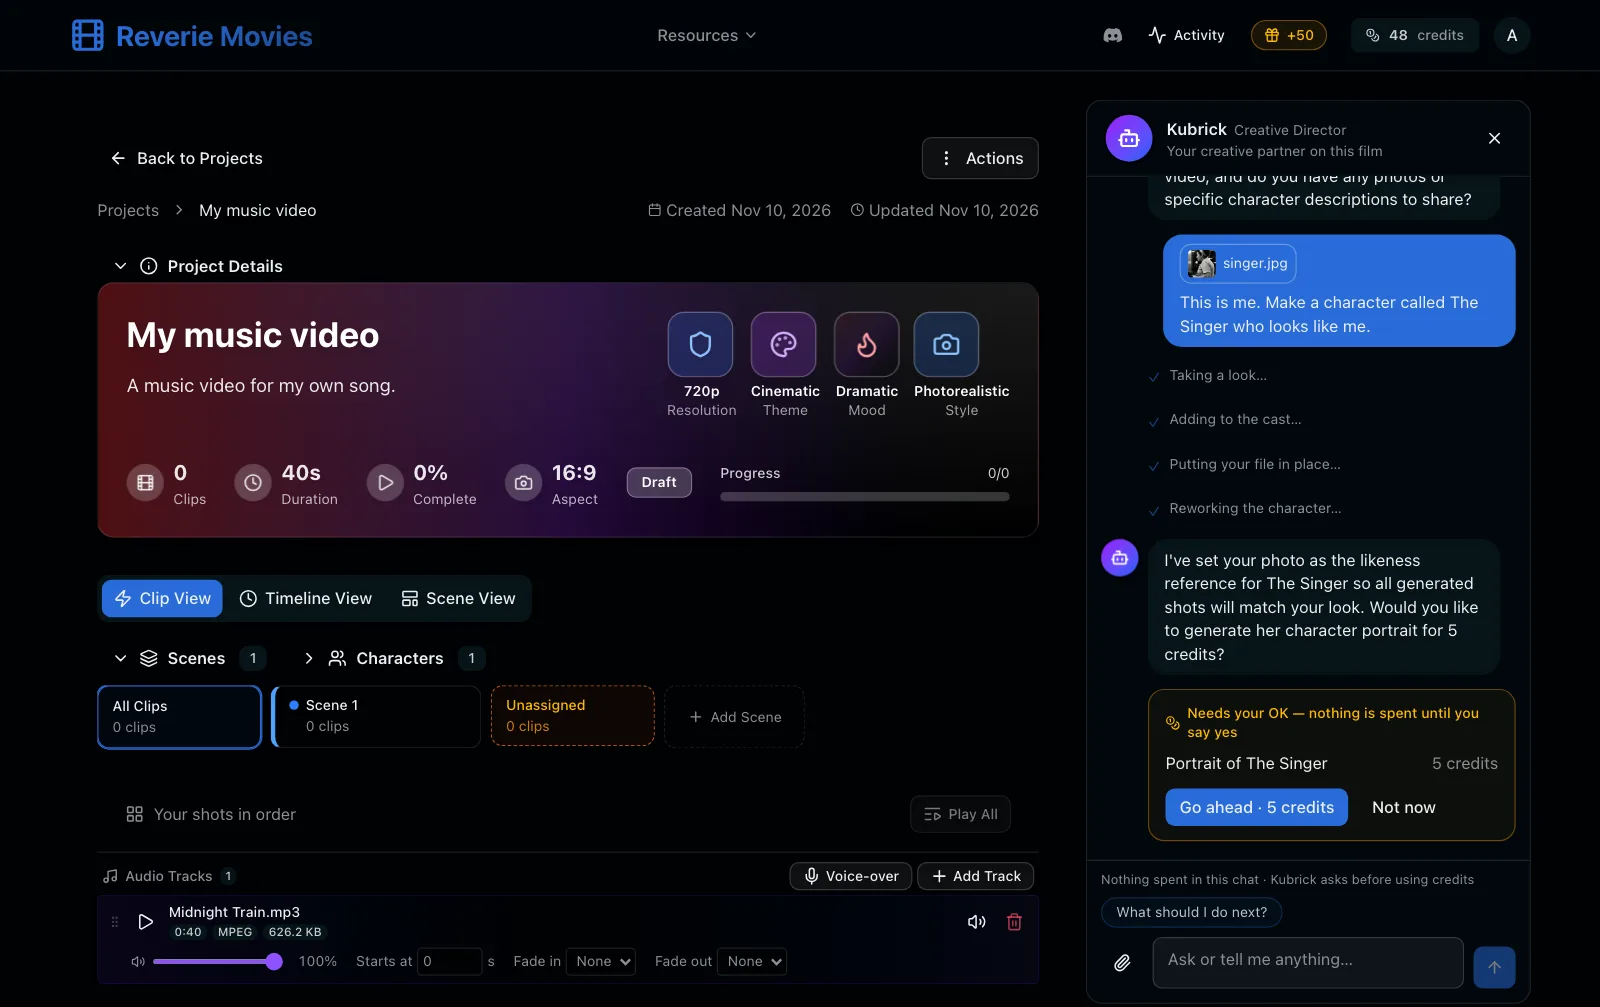
- Say who it is, in your own words: “This is me” is enough. To give them a name: “This is me. Make a character called The Singer who looks like me.”
- Repeat for each person. If you have a script, use the names it uses.
- If your idea has you in it and there’s no photo yet, Kubrick asks for one before he makes any pictures, so every shot shows you.
- To keep their faces the same in every shot, see the Characters guide (link below).
If the character comes out as a different person, the photo wasn’t marked as a real person. Tell Kubrick “That photo is me”, and he’ll fix it.
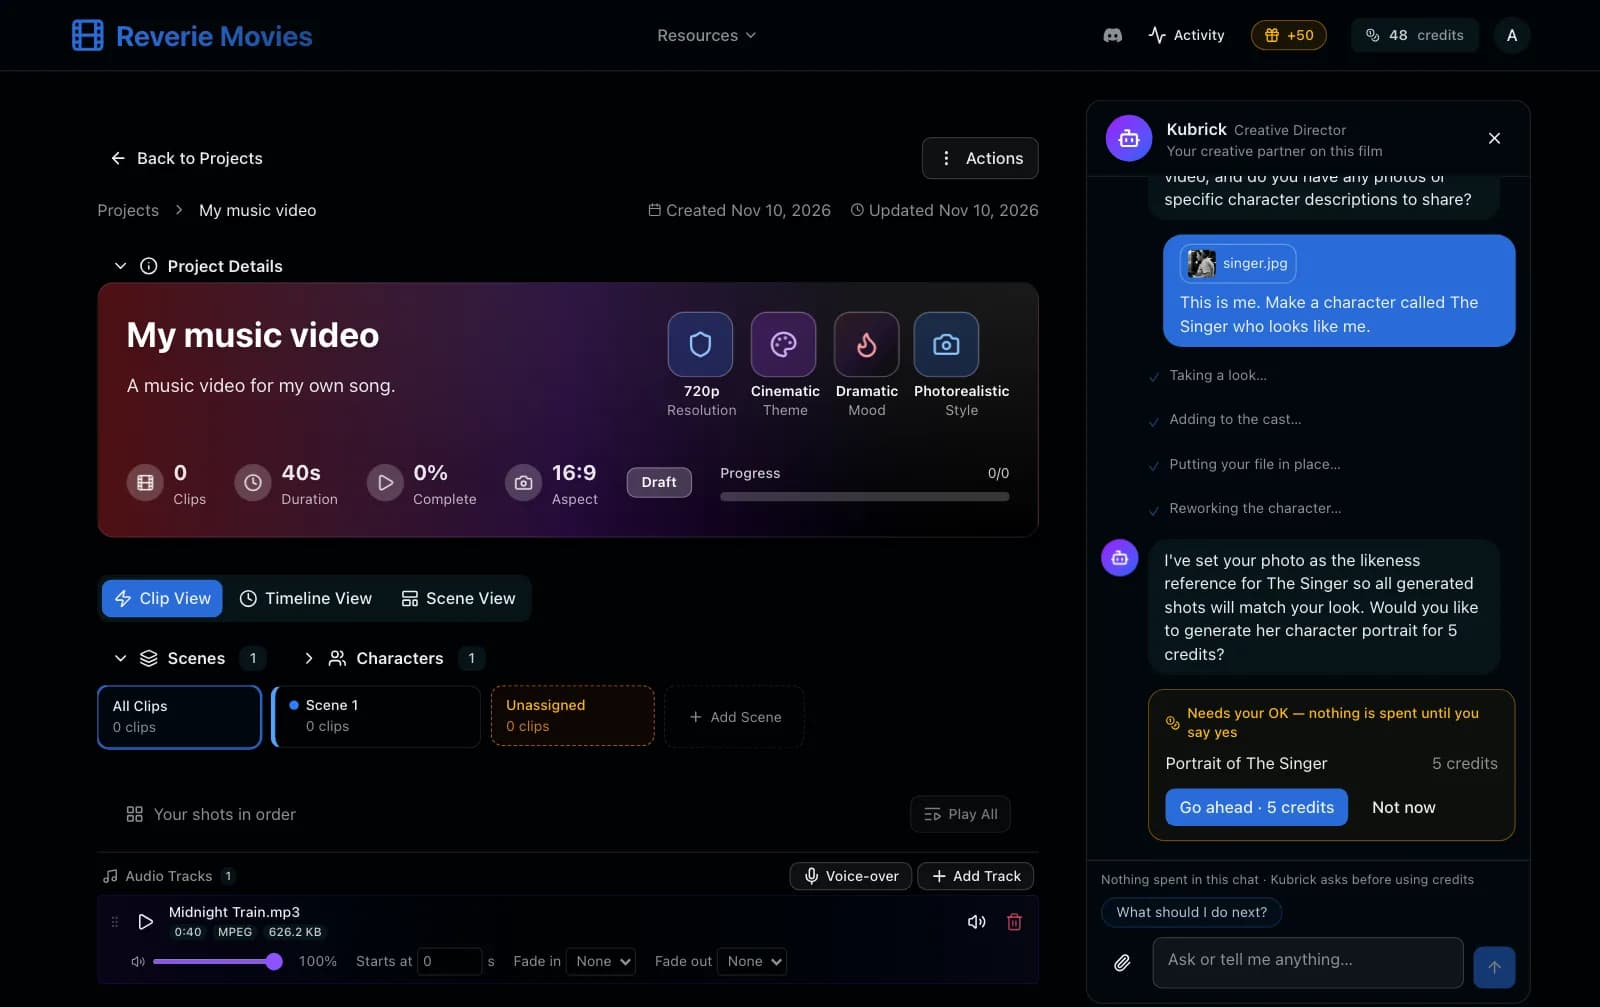
The song is on the timeline, the photo is The Singer’s likeness, and nothing is spent until you press Go ahead. 4Describe your idea, or paste your script
Kubrick plans the whole film to the length of your song: a scene for each part of it, every shot, with the cuts on the beat. Planning is free, and he makes no images or videos without asking.
- An idea in a line is enough. For example: “Me floating through fantasy and sci-fi worlds, cutting in time with the music.” Kubrick works out the scenes, the shots and what happens in each.
- Have a script? Paste it into the message box, with a line like: “Here is my script. Build it exactly as written, timed to the song.” A list of shots under scene headings is enough; add times if you have them.
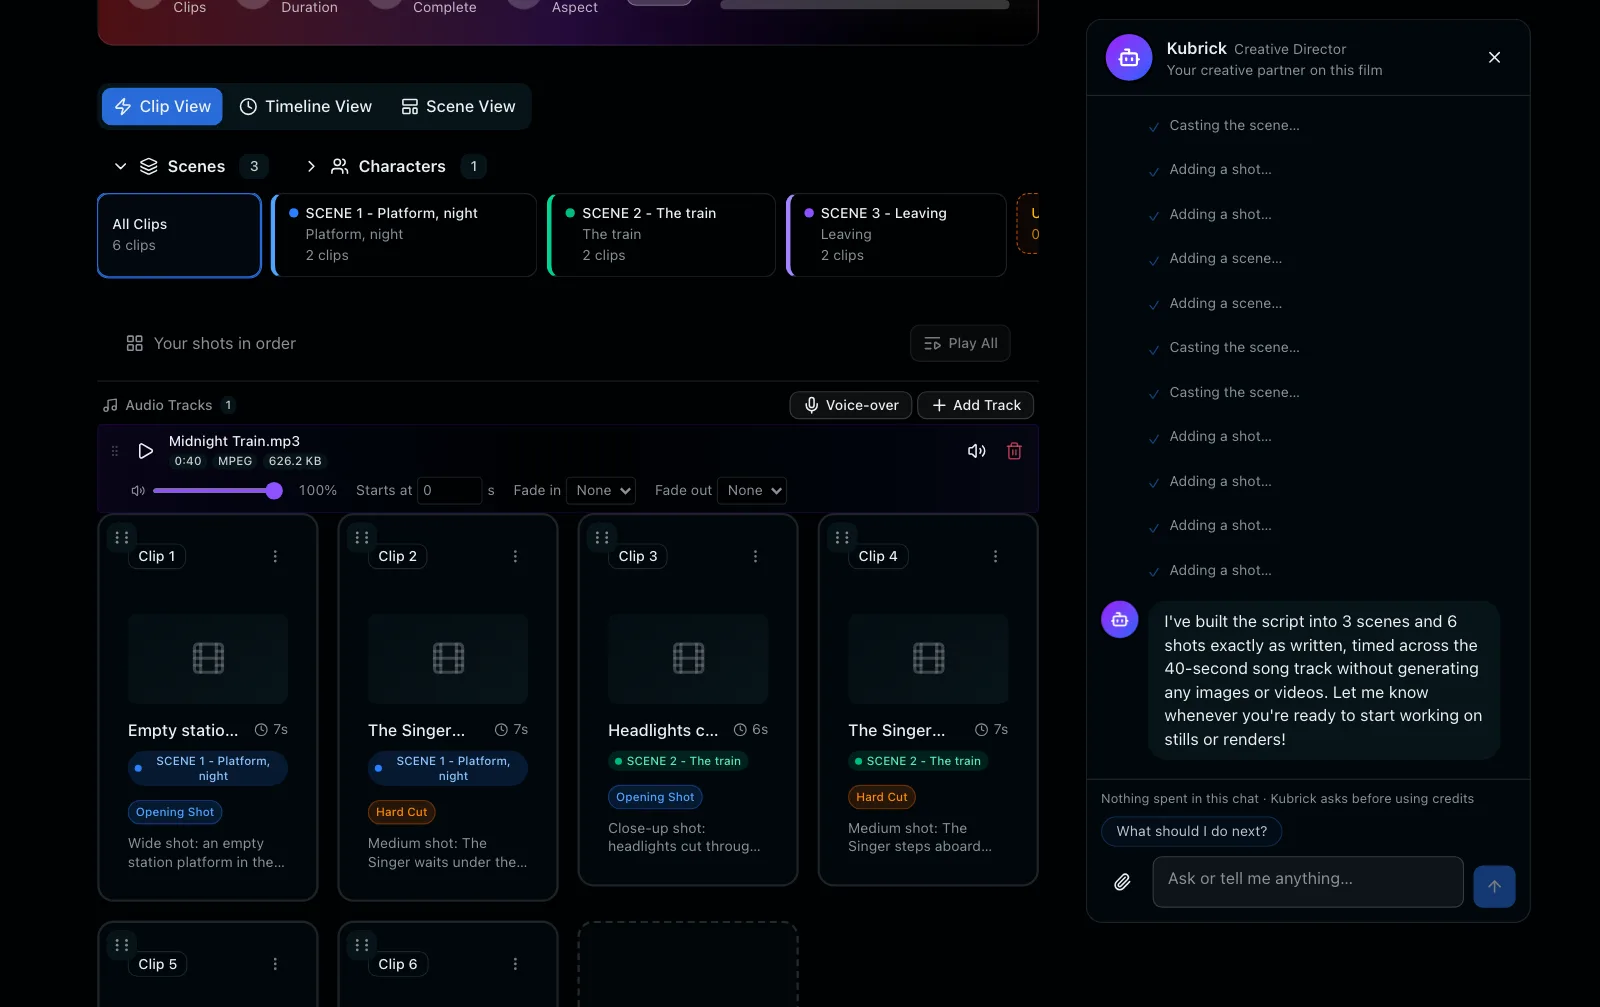
- He tells you how many scenes and shots that is, and how long they run next to the song.
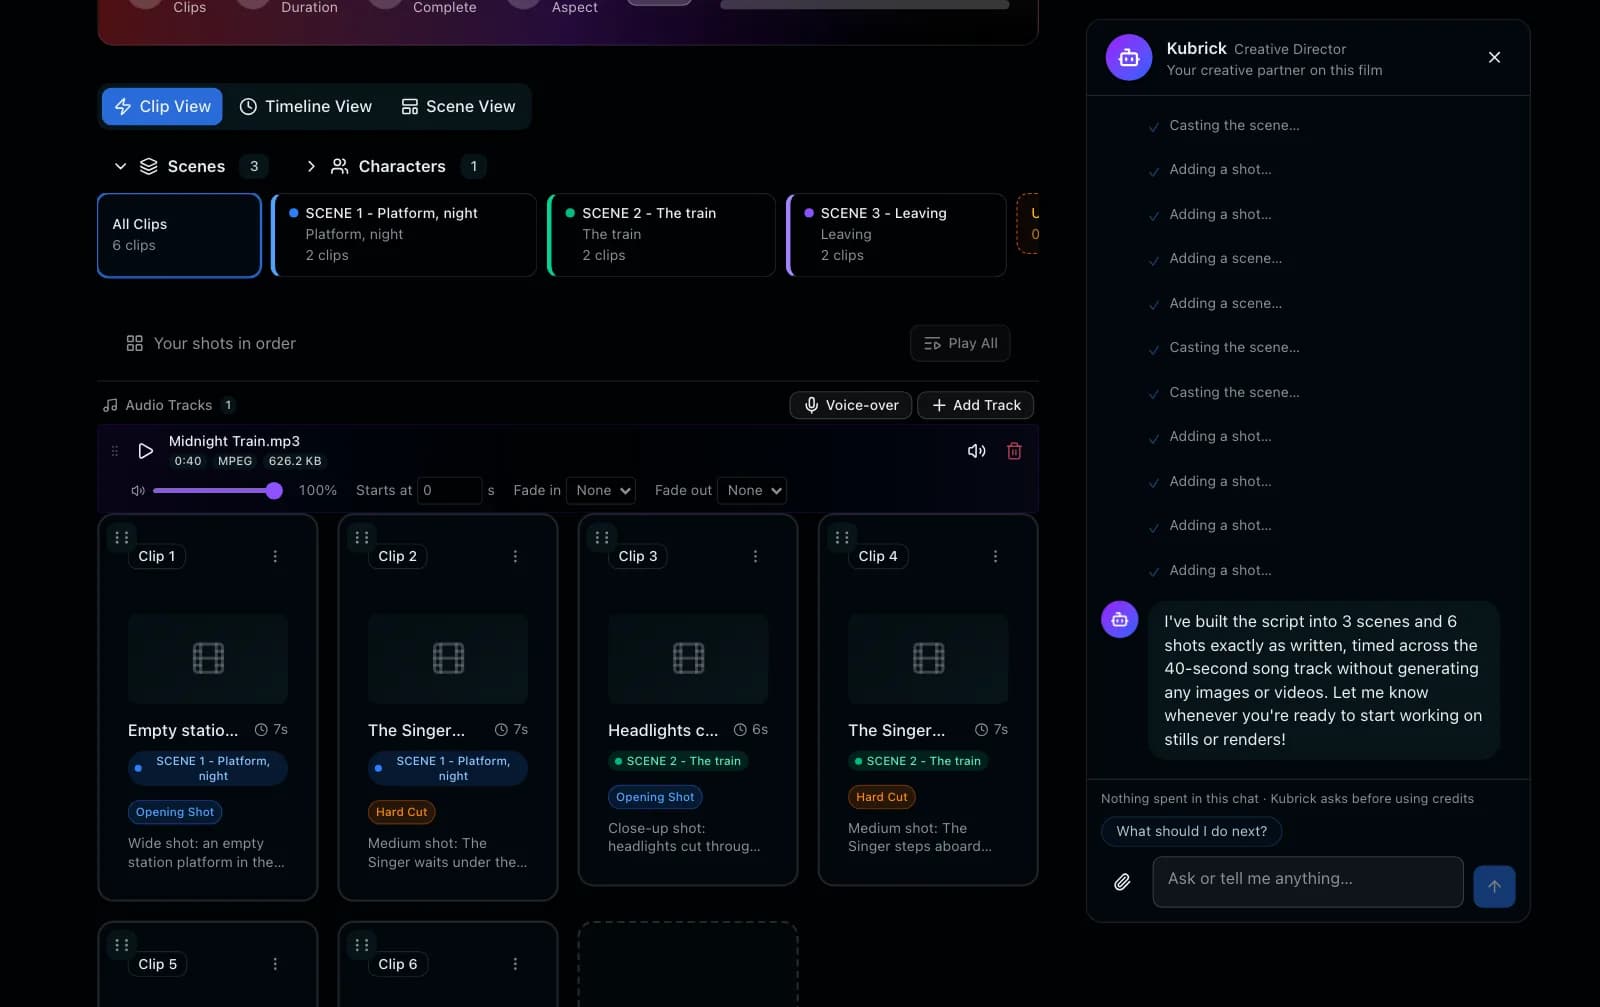
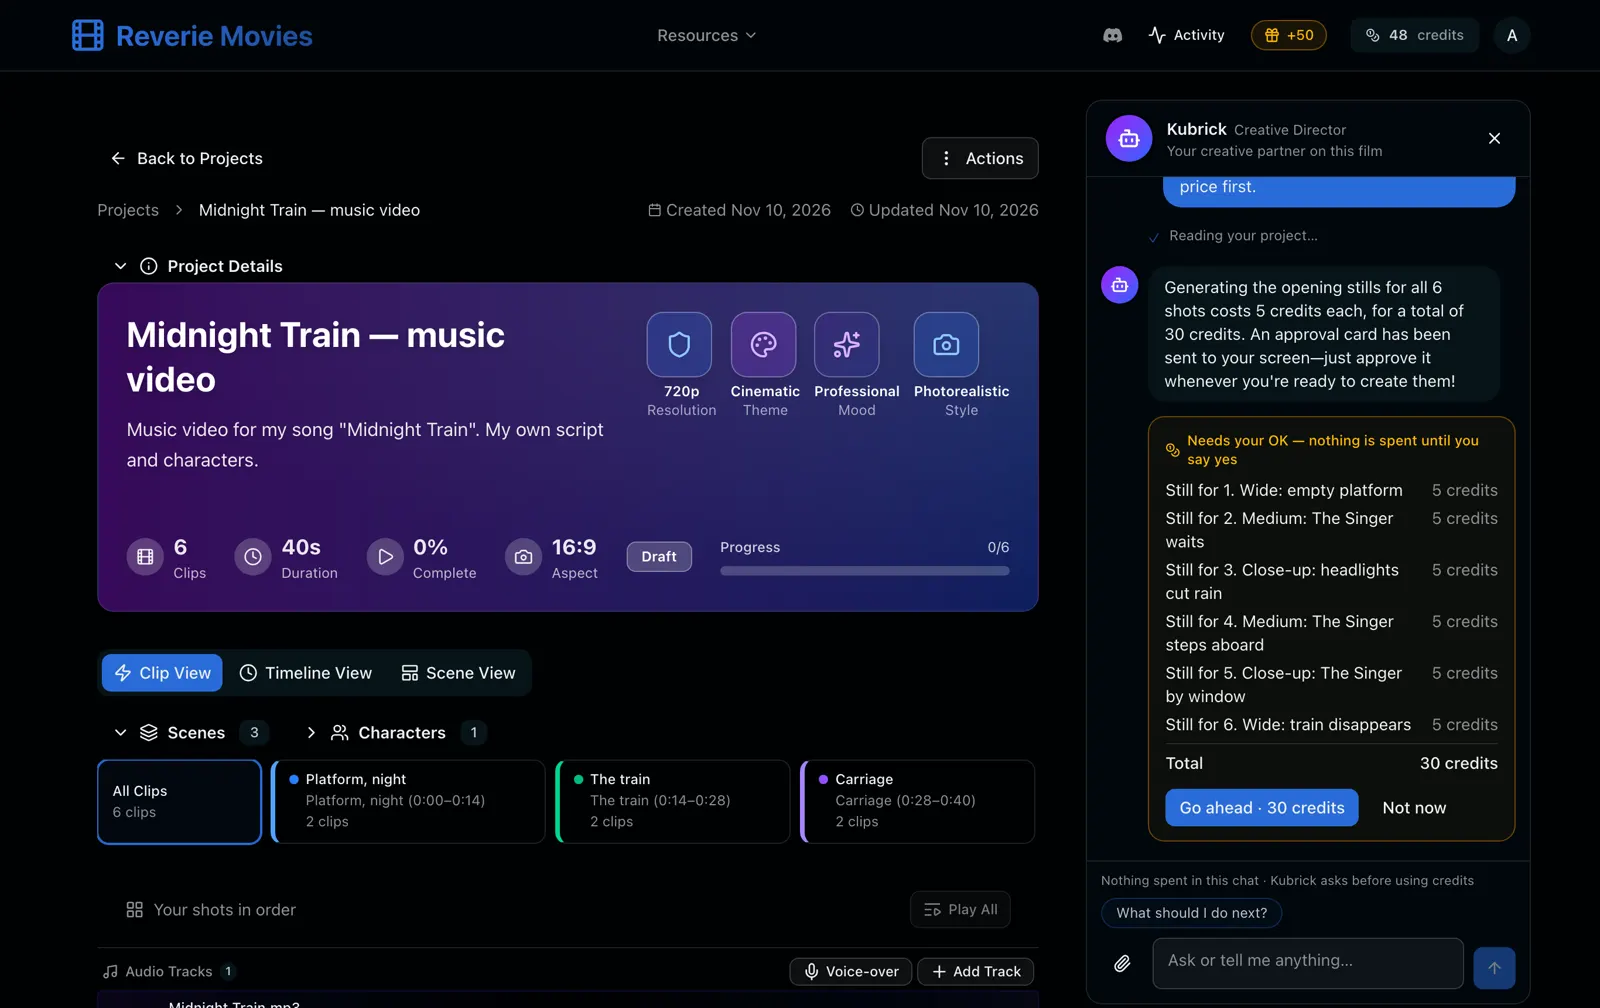
A six-shot script, built as written: three scenes, six shots, matched to the song’s 40 seconds. 5Check and adjust the storyboard
- Clip View shows every shot as a card, in order, with its length. Scene View shows the scenes and who’s in them. Timeline View lines the shots up against your song.
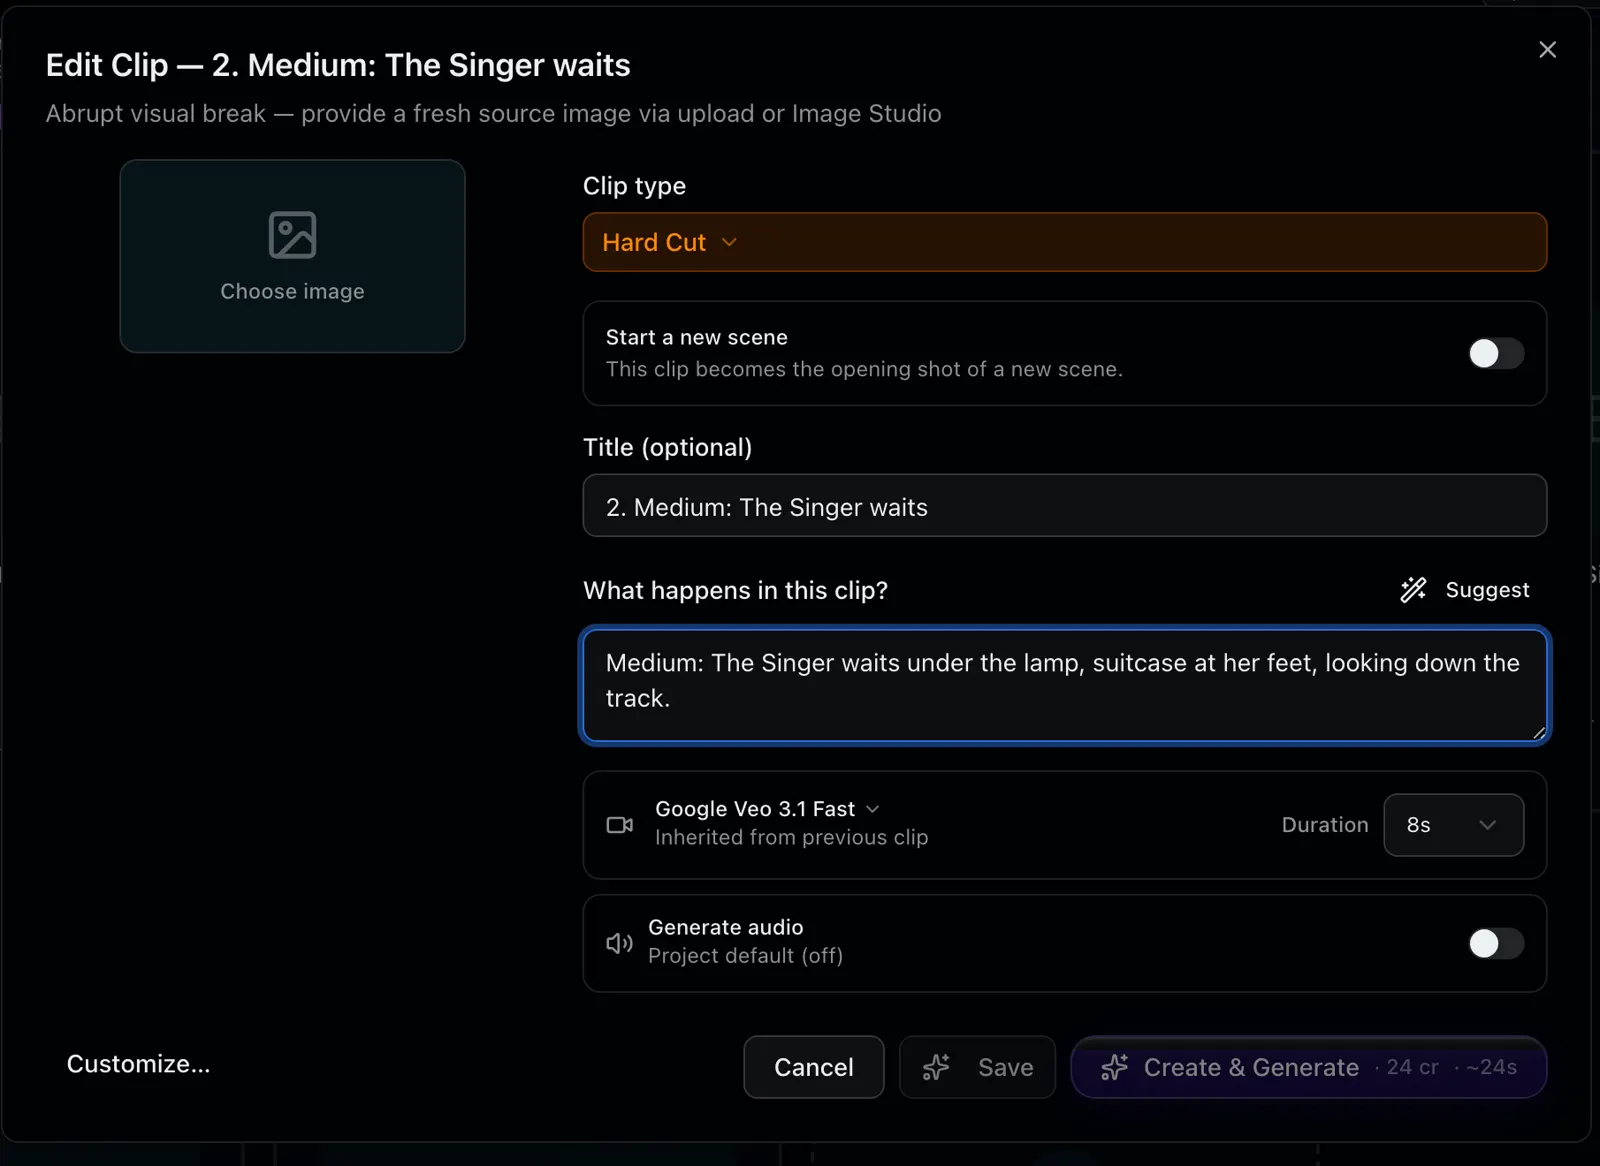
- To change a shot yourself, click its card, then Edit. Change the text under “What happens in this clip?” or the Duration, and click Save. Saving is free.
- Or tell Kubrick: “Make shot 3 four seconds and shot 4 ten.”
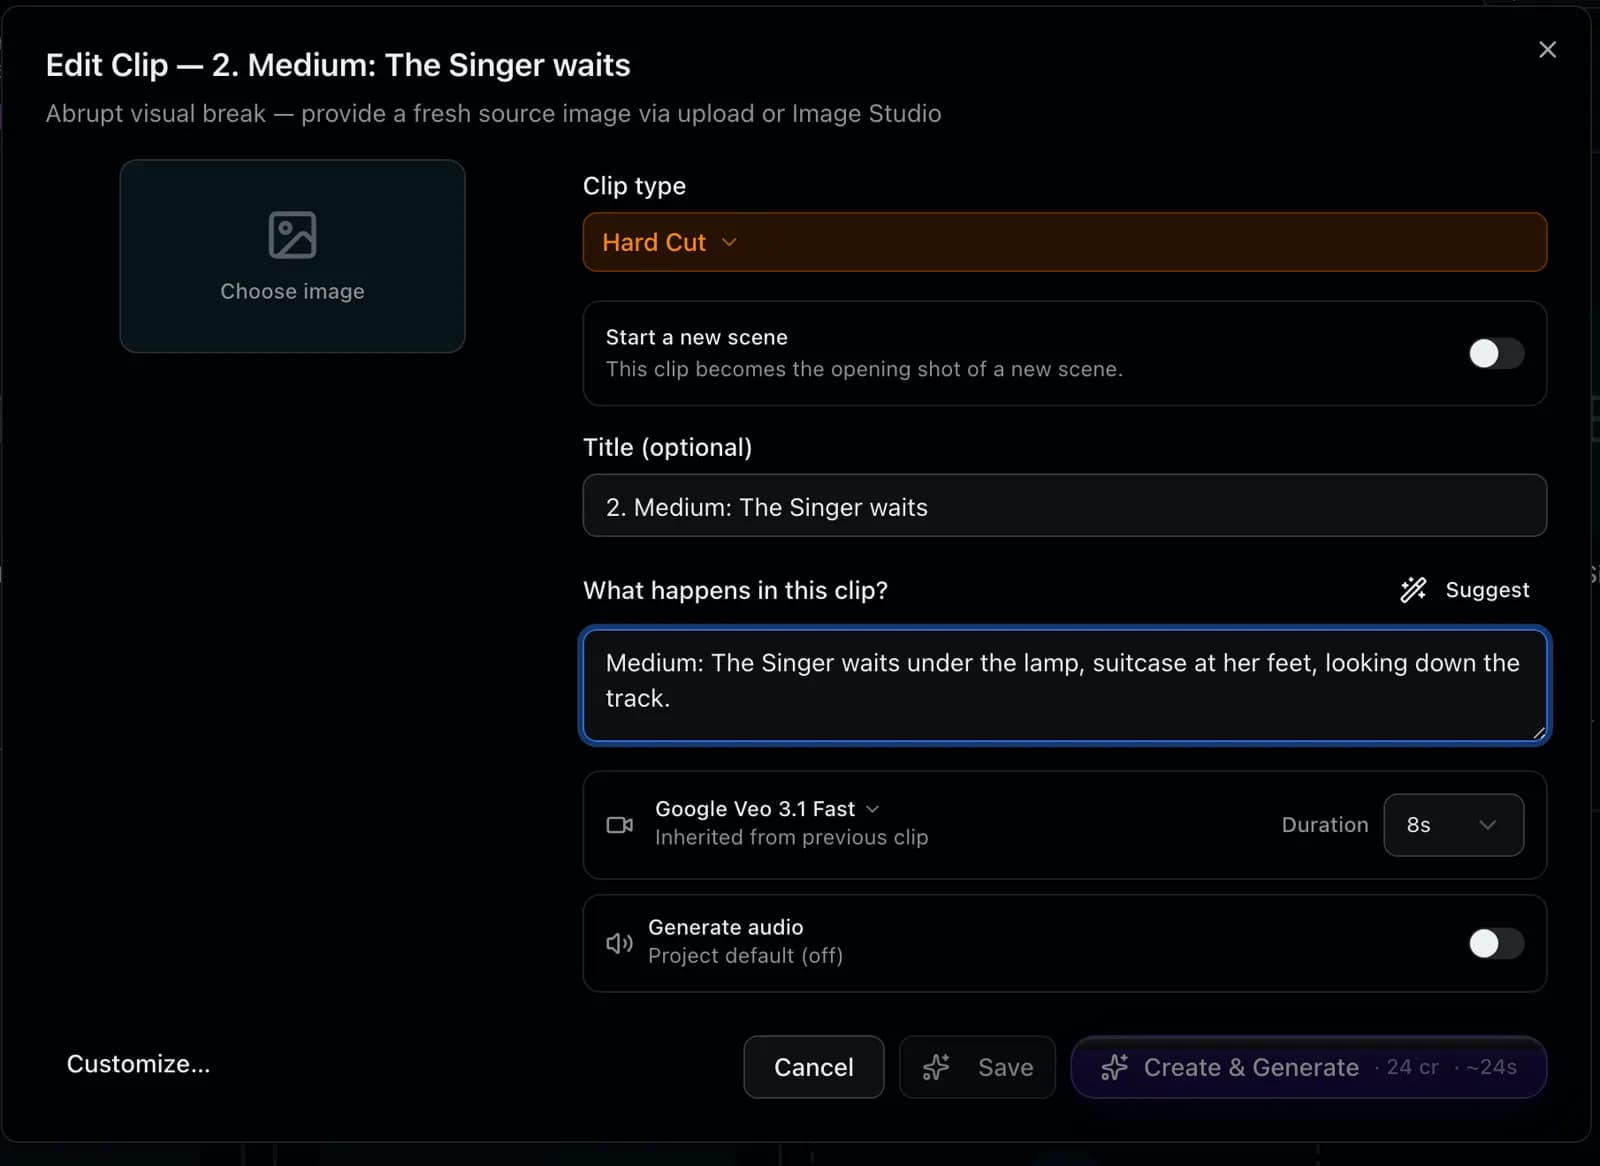
Editing one shot. Save is free; Create & Generate shows its price before it renders. 6Make the pictures, then the videos
Production has two stages: a picture for each shot, where you check faces and the look, then the video for each shot. Kubrick leads the way, and shows the price of each step on a card first.
- He offers the first shot’s picture first, so you see the look before anything else is made. Click Go ahead, or just reply “yes”.
- If it looks right, say so. He asks whether to make all the other pictures at once, or one at a time so you can check each.
- He tells you in the chat as they finish, and what’s next. To redo one, say what’s wrong: “Shot 2: her scarf should be red.”
- Then the videos, the same way. Nothing is spent until you press Go ahead or say yes.
For the same face in every shot, ask for Kling 4.0: it uses each shot’s image and your characters’ photos together. It’s a premium model, unlocked by any credit pack. Wan 3.0 is included on a free account, and works well when each shot starts from an image that already shows your character.
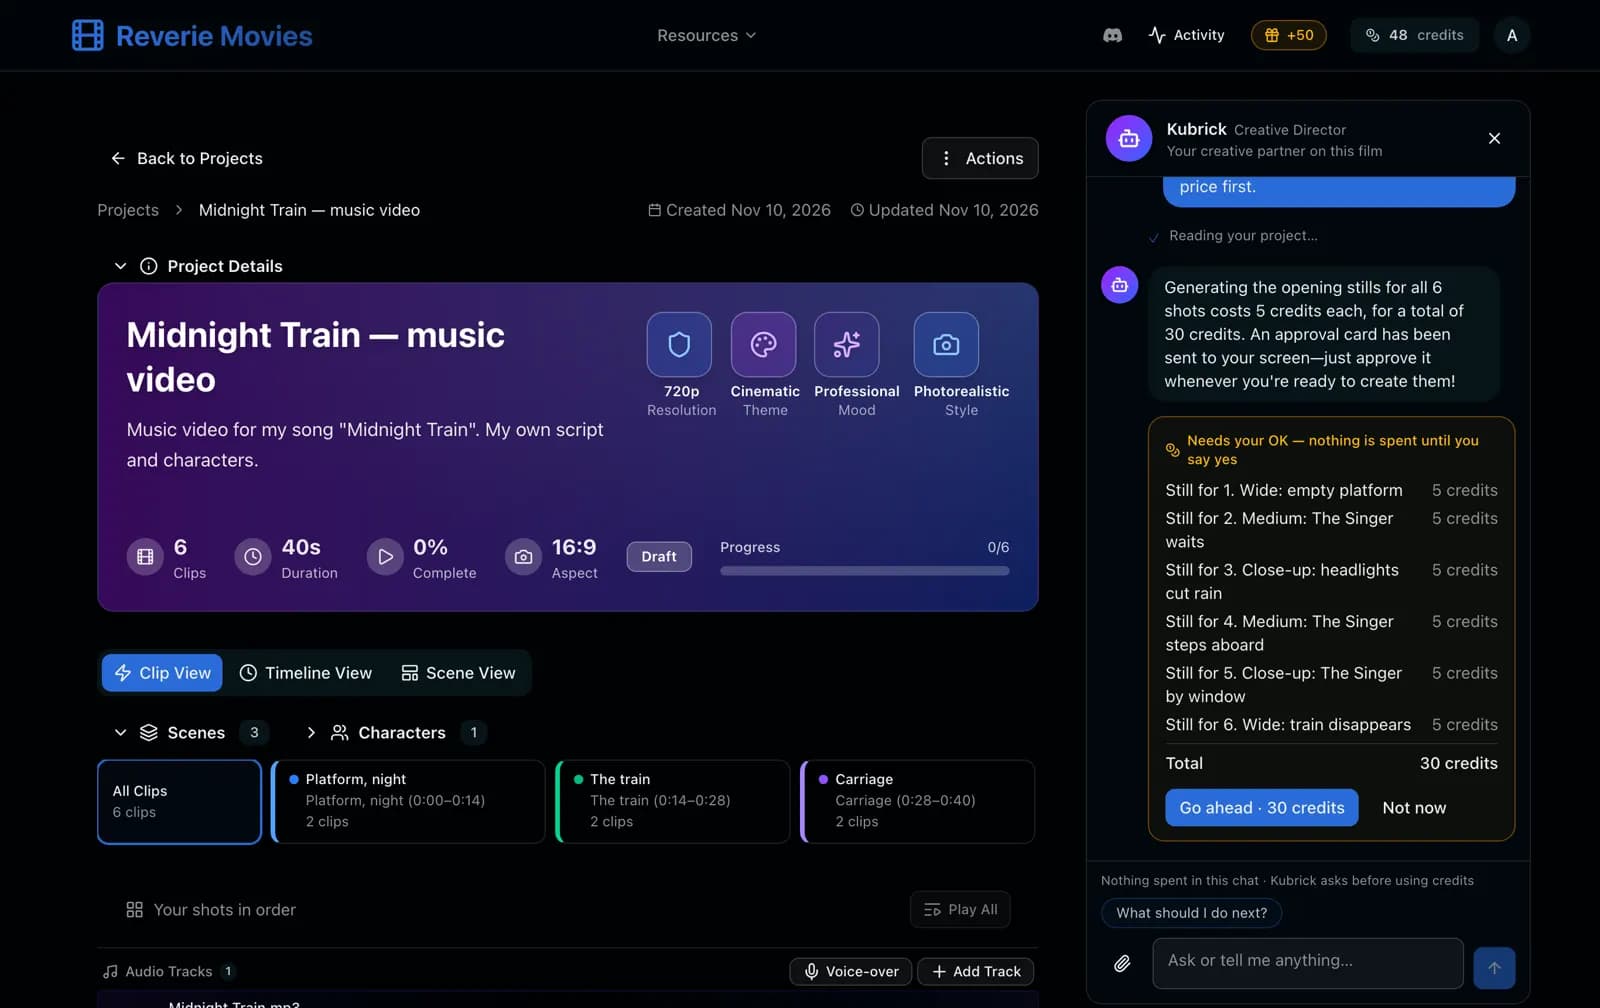
Nothing is spent until you press Go ahead. Here: six images at 5 credits each. 7Lip-sync, then export
- Lip-sync the singing shots last, once their timing is final: the sync is matched to each shot’s exact place in your song. Tell Kubrick: “Lip-sync shot 5 to my song.”
- Then: “Export the film.” Both show a price first. Before exporting, Kubrick lines every cut up with the beat again, and tells you if the film ends before the song does.
- The finished film appears in the chat, to watch and download.
Faces changing between shots is the most common problem. The Characters guide covers how to keep people looking the same.
Prefer to do it by hand?
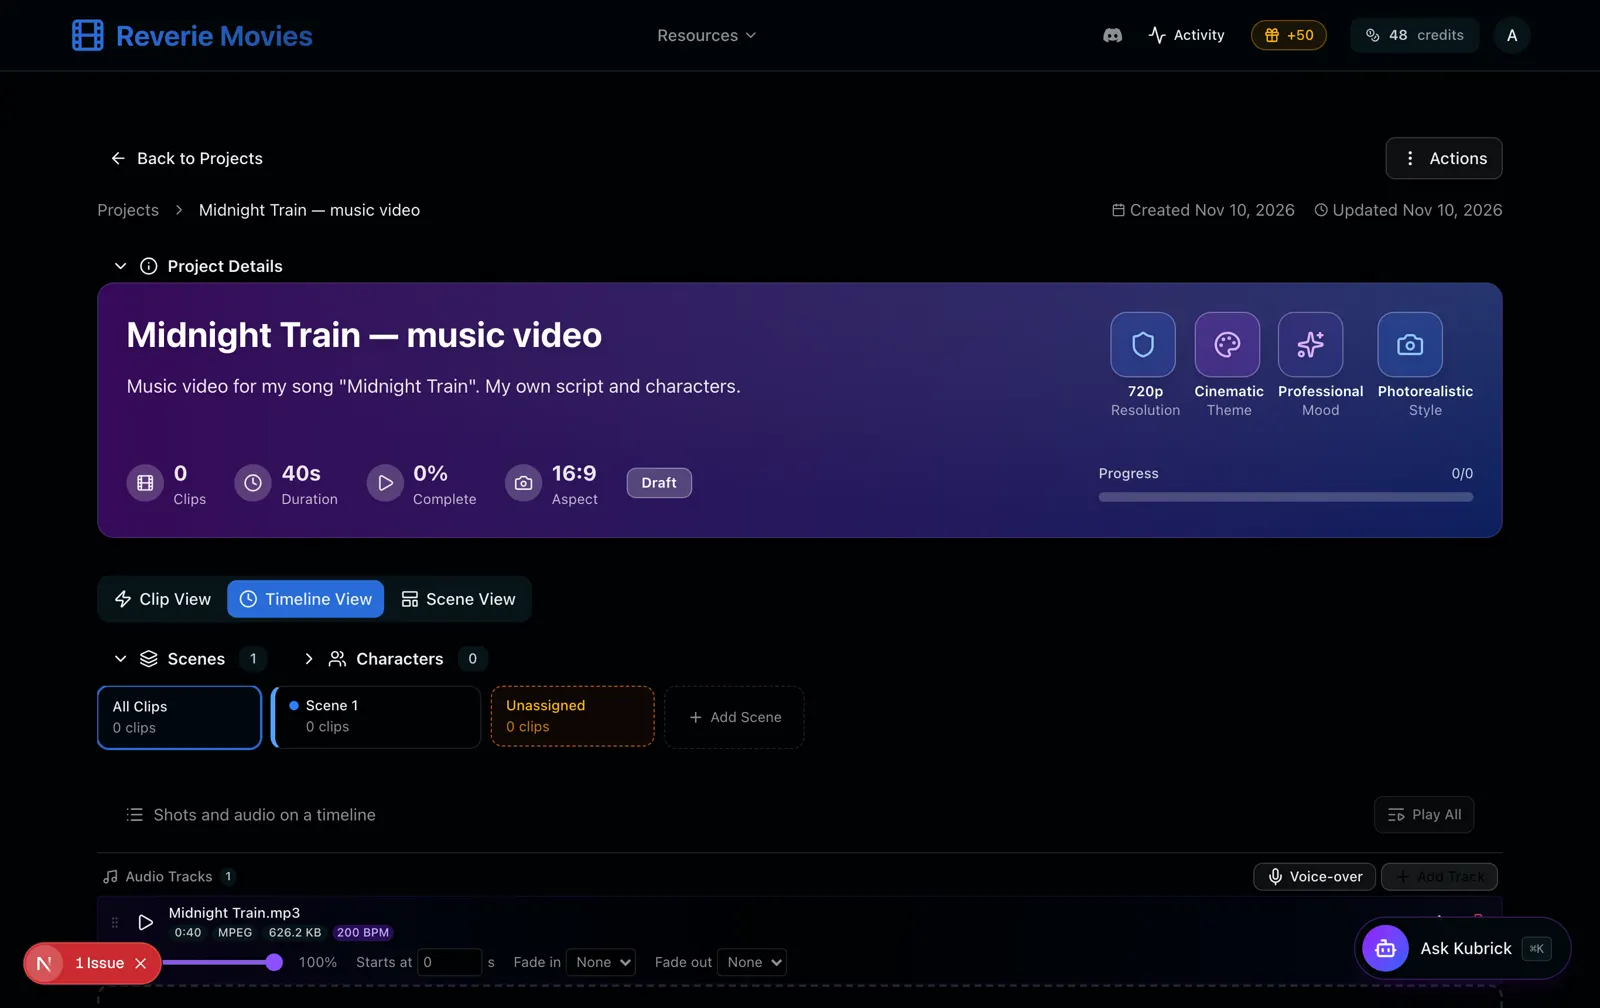
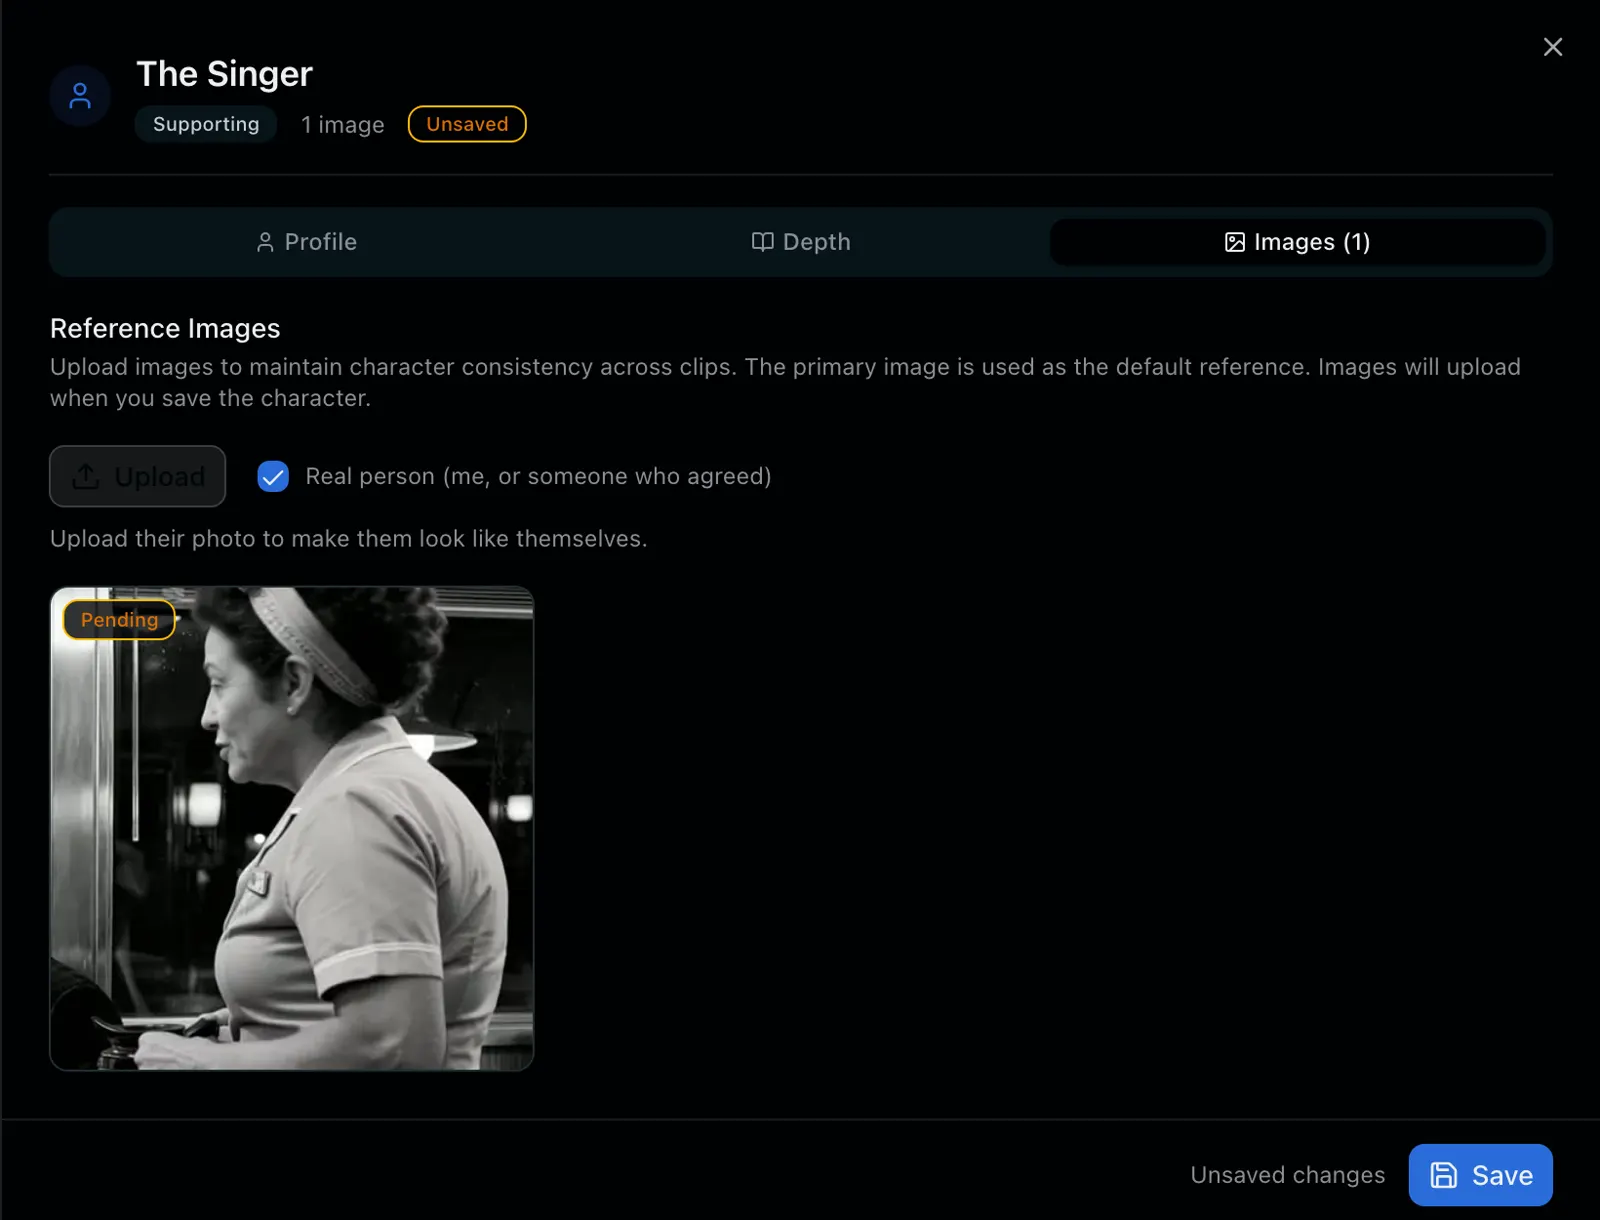
Everything Kubrick does is also on the project page, on a computer. Add the song under Audio Tracks → Add Track. Add each person under Characters → Add Character: name them on Profile, then on Images click Upload and choose their photo. When it asks who is in the photo, choose “Me, or someone who agreed”, and Save. Otherwise the character is drawn as someone else.
On a phone
The steps are the same. A project opens on Kubrick, with Film and Watch tabs at the bottom. Film is your storyboard (the shots under their scenes) with your characters and your song beside it; Watch plays the film so far. Add your song and photos with the buttons or the paperclip, and make changes by telling Kubrick: the pictures and videos he makes appear in the chat. The timeline editor needs a bigger screen.
With ChatGPT
The Reverie Movies app in ChatGPT makes the same film in the same project. Tell it you have your own song. It gives you a link: tap it, choose the file, and go back to the chat and say it’s uploaded. It does the same for each photo; say whose photo it is. Each link lasts an hour and takes files up to 100 MB. Then paste your script. You can open the project on reveriemovies.com at any point and carry on there.
Stuck on a step?
Ask on our Discord, or email justin@reveriemovies.com with a screenshot of where you are.
Start your music video