Keep your characters the same, shot to shot
AI video is still early, and a face drifting between shots is the most common problem. It can be managed. This is what we learned making our own films, in the order you’ll meet it. Planning and editing are free; every step that costs credits shows its price first.
The short version
- Start with one clear, front-on portrait of each character. A real photo is best.
- Say who is in each shot, so their portraits are used to make the shot’s picture.
- Make the picture first and check it. A picture costs a few credits; a video costs many.
- For faces that must be identical across many shots, use a premium model such as Kling 4.0. On a free account, Wan 3.0 from a picture that already shows the character does best.
- Give a shot an end frame whenever someone enters partway through it.
- Check each shot before building the next one on it. Mistakes carry forward.
1 · Make the character
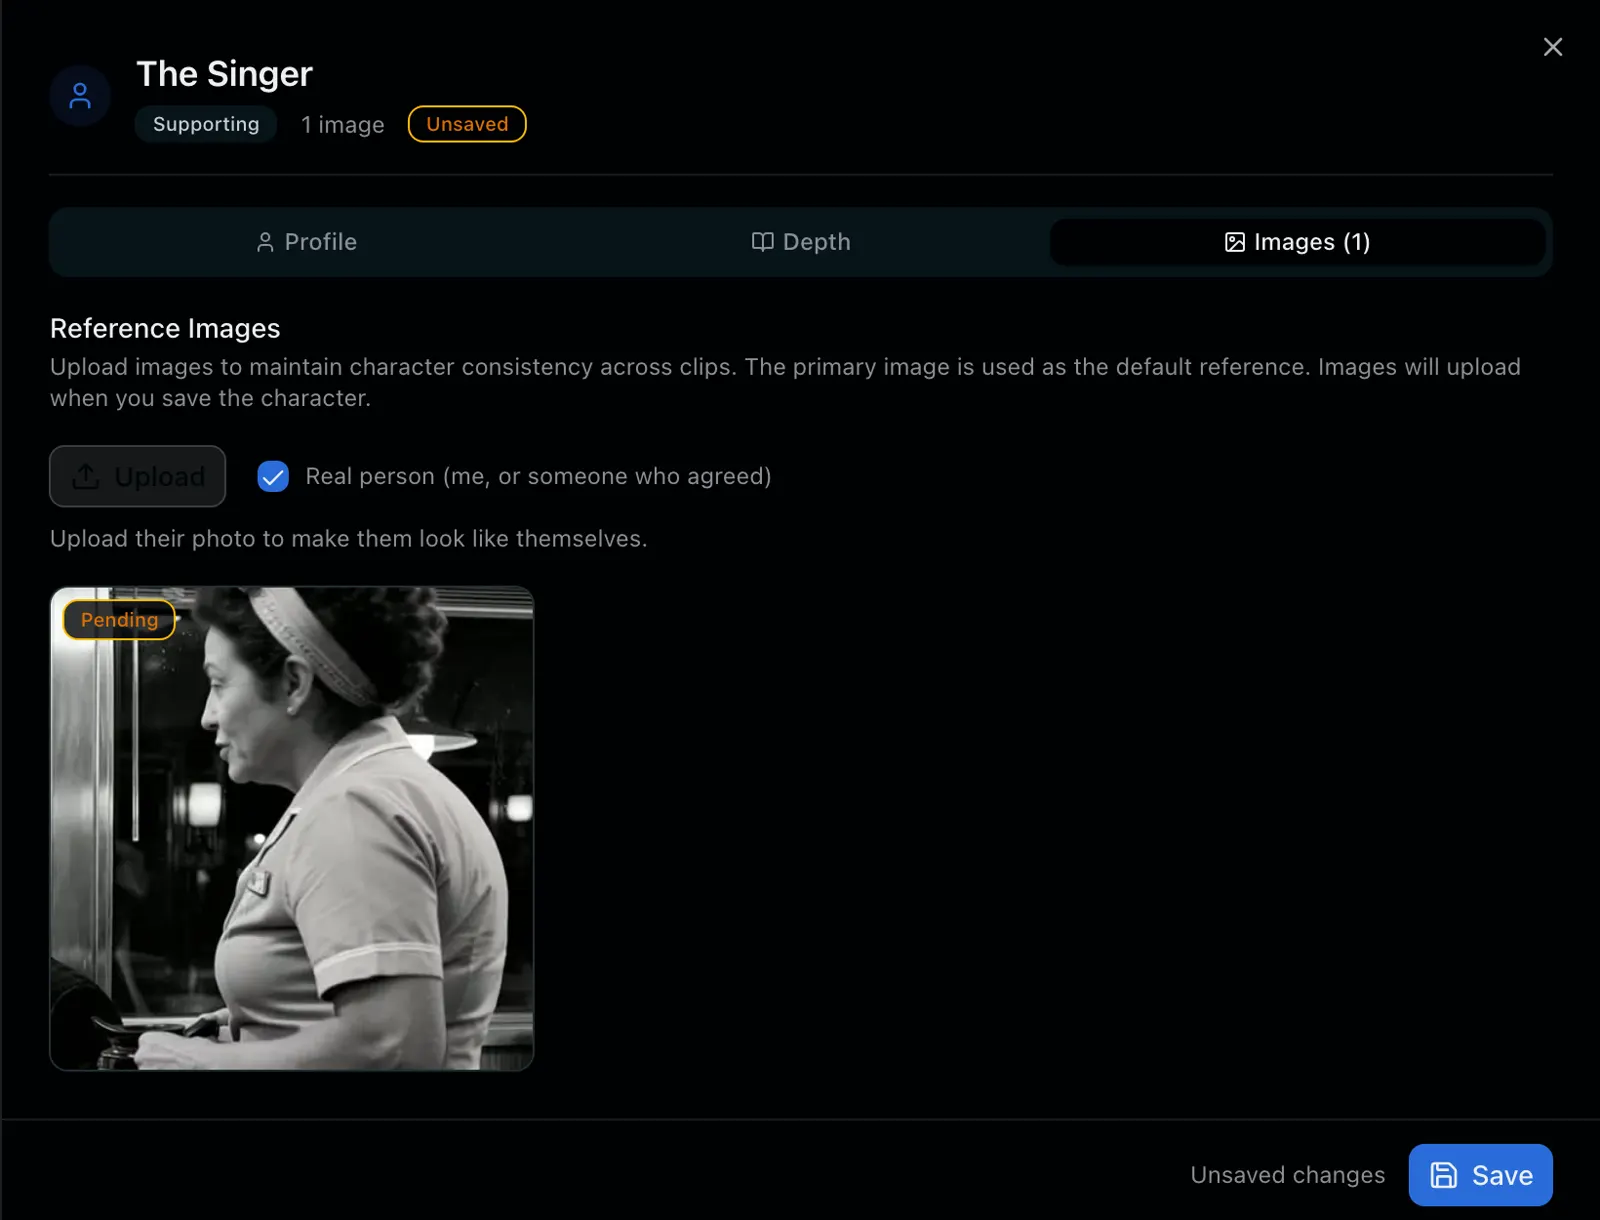
Everything below works better with a good portrait: one person, facing the camera, well lit, with their clothes and hair as they should appear. If you want a real person (you, or someone who agreed to appear), use their photo, and say so. For privacy, Reverie draws everyone it generates as a stylised, unrecognisable person unless you say a photo is of a real person who agreed.
- On a computer: Characters → Add Character. Name them and describe their look on Profile. On Images, click Upload and choose the photo. Reverie asks who is in it: answer “Me, or someone who agreed” for a real person, then Save.
- With Kubrick: attach the photo and say whose it is and what to call them: “This is me. Make a character called The Singer who looks like me.” He offers a portrait and shows its price.
- With ChatGPT: ask it to add a character from your photo. It gives you a link to choose the file; say whose photo it is.
- No photo? Describe them and ask for a portrait. Say the same things about their clothes in every prompt afterwards. Our black-and-white film stayed black and white by using black-and-white portraits and prompts throughout.
2 · Say who is in each shot, and make the picture first
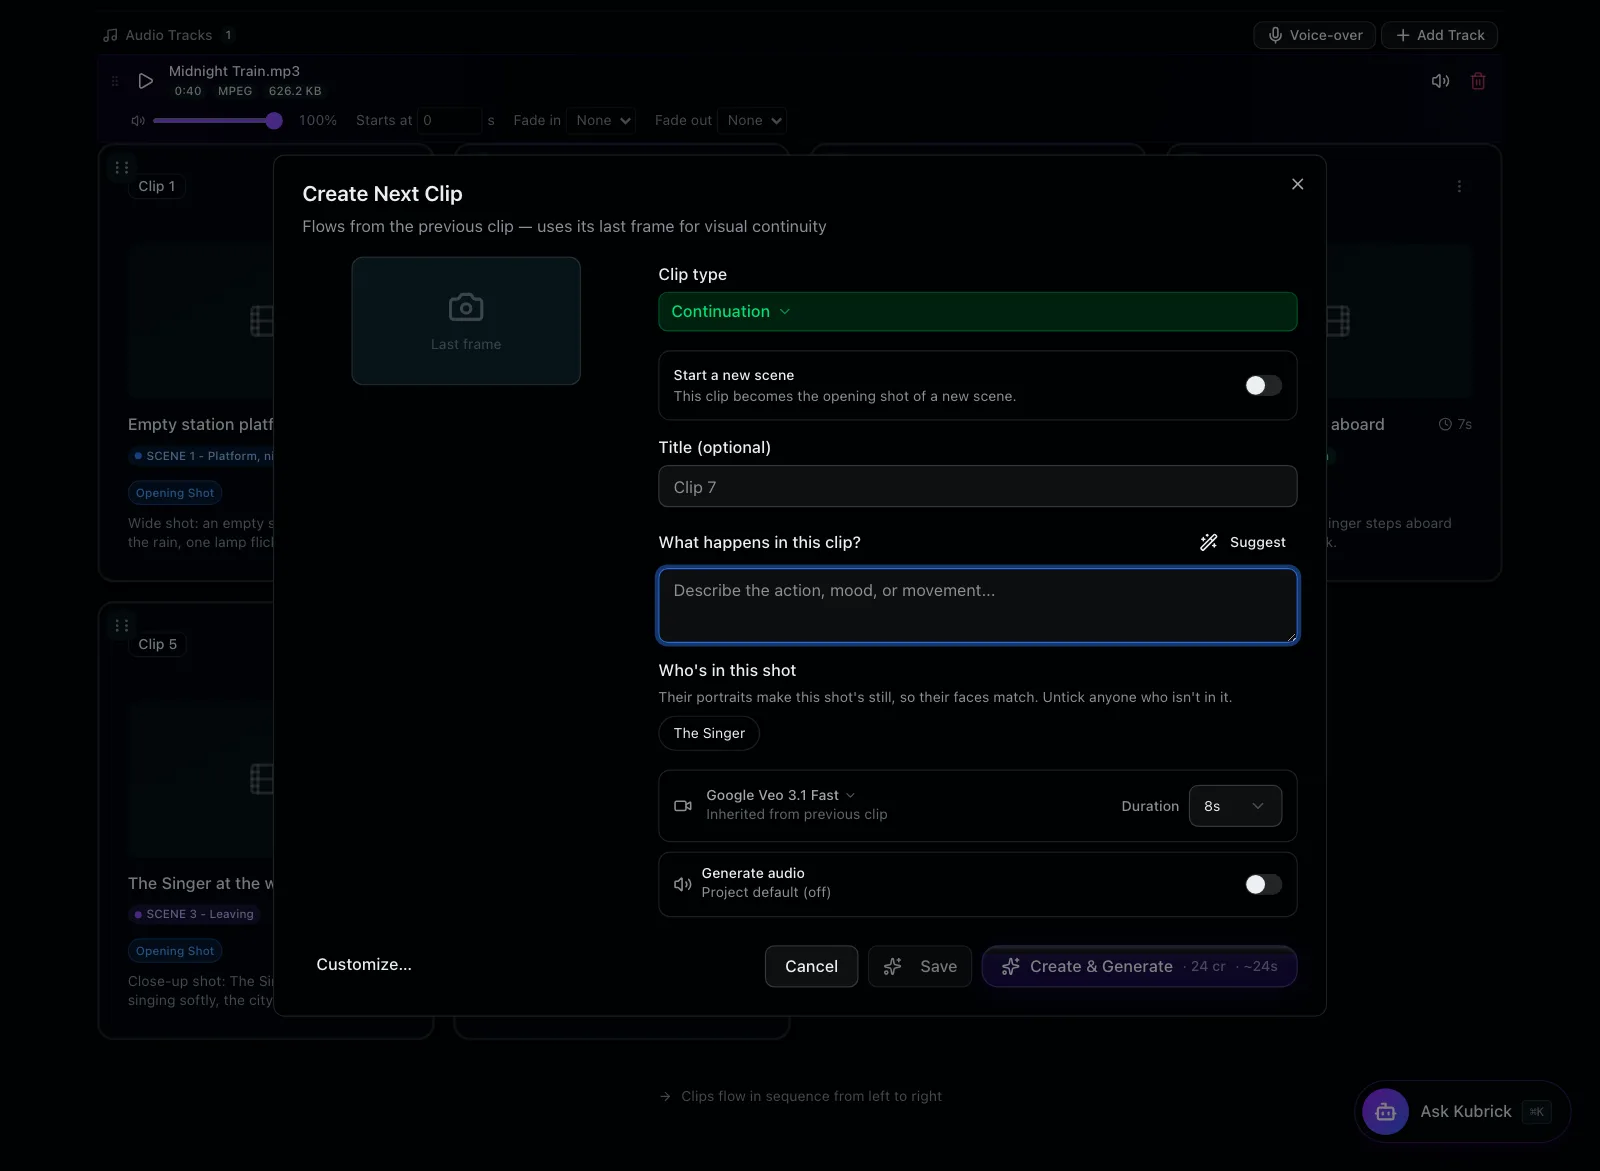
When a shot knows who is in it, its starting picture is made from their portraits, so their faces match. In the Add Clip window this is “Who’s in this shot”; untick anyone who isn’t in it. With Kubrick or ChatGPT, say it: “Include The Singer in shot 3.” Do this before you make the picture.
Then make the picture on its own and look at it before you render a video from it. A picture is a few credits; a video is many. In our example project a picture is 5 credits, and an 8-second shot on Veo 3.1 Fast is 24. Check it against the portrait and the shots either side: clothes, hair, props. A change of clothes between two shots shows as a costume change at the cut. You can ask Kubrick to look at it: “Does this still match her portrait?”
3 · Choose the model for the job
- Faces that must be identical across many shots: a premium model such as Kling 4.0. It is the one that uses the shot’s picture and the portraits together. It is unlocked by any credit pack.
- Free accounts: Wan 3.0, started from a picture made from the portraits. From the portraits alone it gave us a different face, so make the picture first.
- Careful on the others: on Veo and Wan, naming characters in the render swaps your picture for a new one made from the portraits. If you already have the picture you want, don’t name them there. The price quote says which will happen.
- Groups of people and children: Kling. Some Veo models add strangers to wide group shots, and Google’s filter can refuse video of children.
- People who talk: Kling 4.0, with each speaker’s voice set from a short sample.
4 · Continuations and end frames
A continuation starts on the last frame of the shot before, so the action carries straight on, and two shots in a row never start from the same picture and jump at the cut. It needs no picture of its own. The catch: it carries forward whatever the last frame looked like, so if a face drifted, the drift continues. Check each shot before building the next on it.
An end frame is a picture the shot should finish on. Use one whenever someone enters partway through a shot, because without it the model invents their face and clothes. Ask Kubrick: “Give shot 4 an end frame showing the conductor.” He makes the picture, shows its price, and sets it on the shot. For a shot whose end is framed very differently from its start, use Kling: Veo models can blend the two into a double exposure.
5 · Character Intro clips
A Character Intro is a clip type for bringing a character into a scene. In the editor, Add Clip → Clip type → Character Intro. It builds the shot from reference images: the previous shot’s last frame and the portraits of the characters you tick, three references in all, rather than from one starting picture. Use it where a character first appears or takes the spotlight.
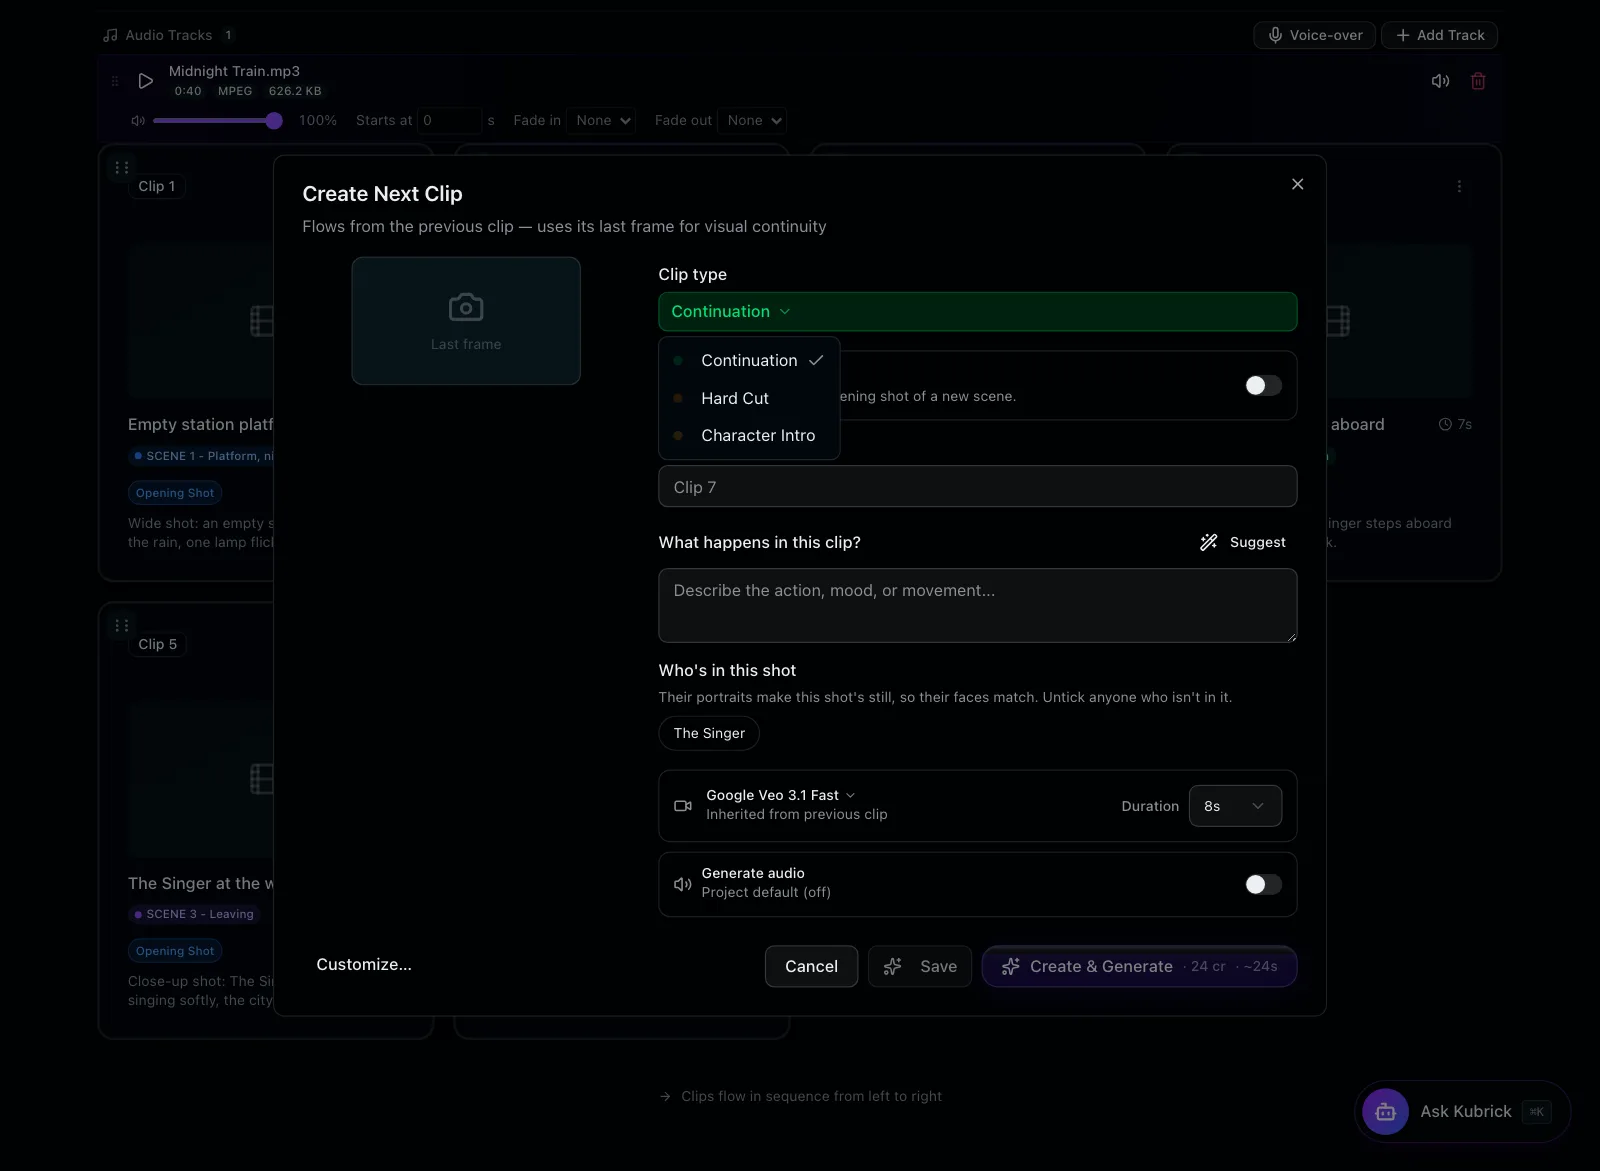
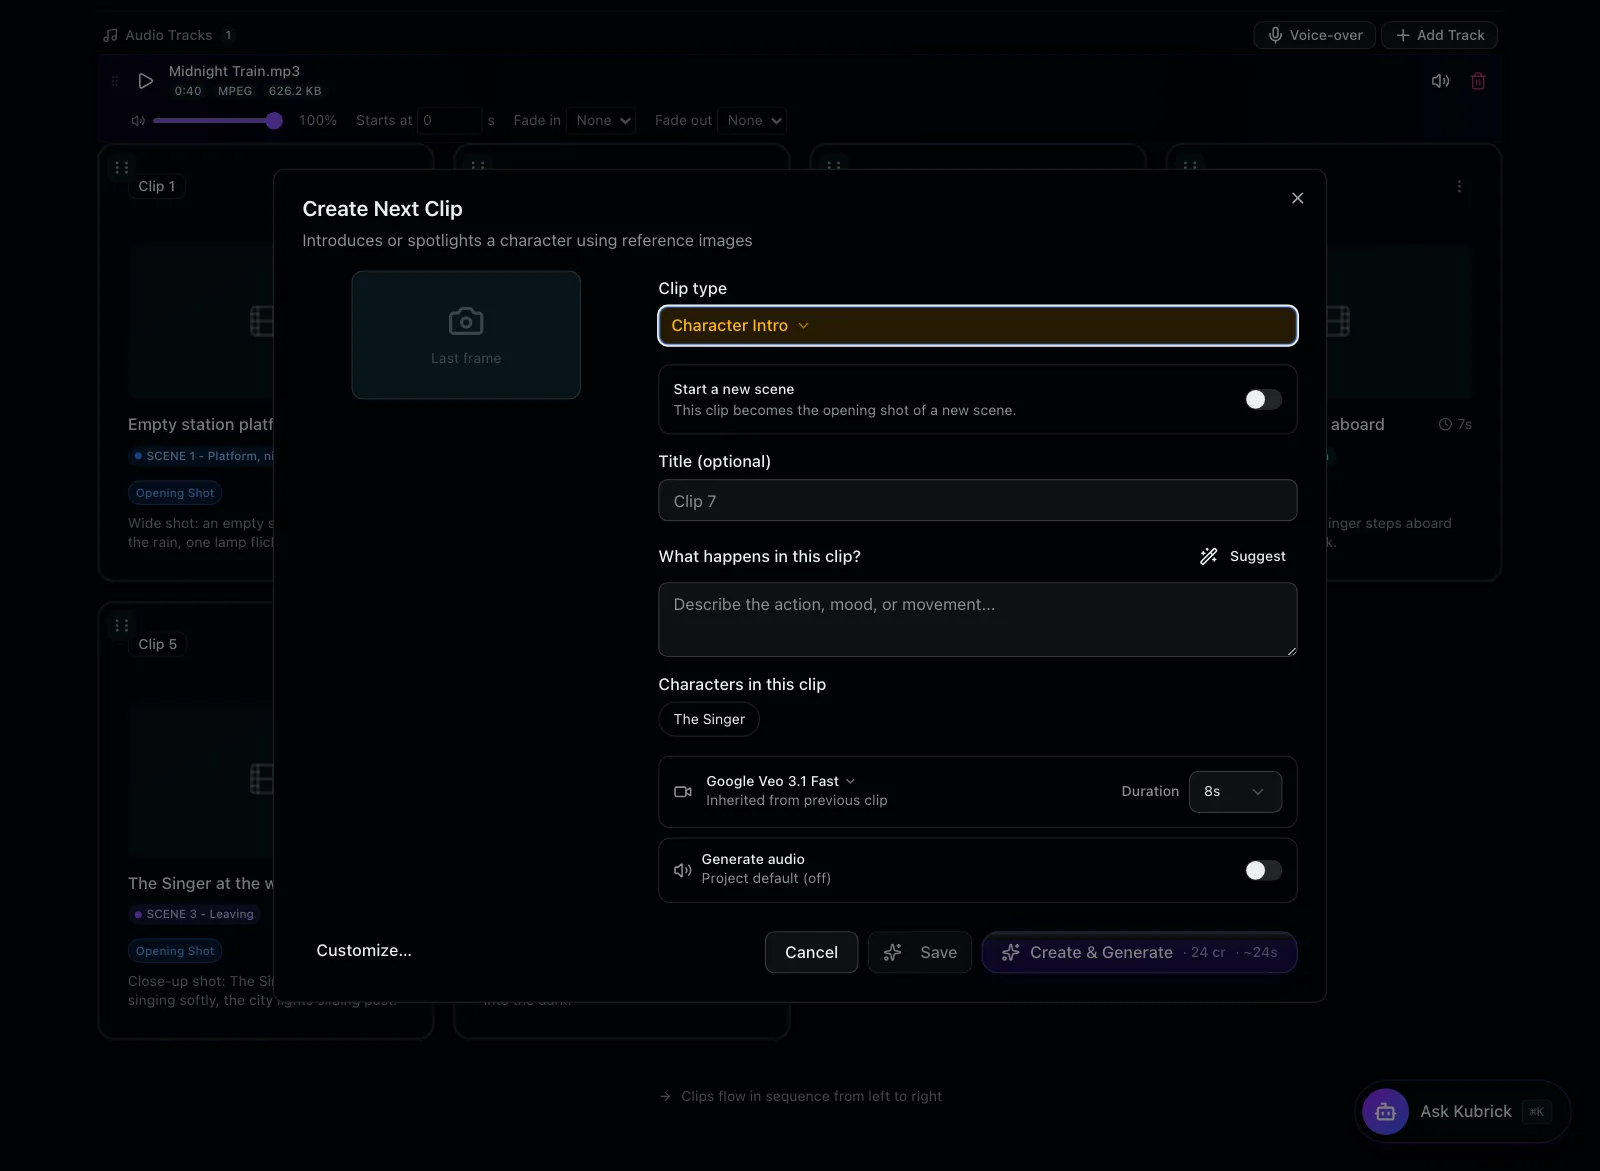
Character Intro is in the editor on a computer. Kubrick and ChatGPT can’t create that clip type yet; ask them to put the character in the shot (step 2) and they’ll use the same portraits.
6 · Write prompts that hold a face
- Describe the costume the same way in every prompt, and say what must not change.
- Name each person’s clothes and where they stand, and add “each stays exactly who they are; nobody changes into anyone else”. This held four people steady in one shot.
- When the camera moves off one person to find another, keep the first visibly in place (“leaves the captain seated in his chair”). Otherwise one can turn into the other.
- Keep small things large in frame. A subject that ends a shot as a blur gets reinvented in the next one.
- Write each continuation so the camera keeps the direction and speed of the shot before it.
7 · Start cheap
One of our films used far more credits than it needed, because we found these lessons by spending. You don’t have to.
- Make the pictures for every shot first, and fix faces there.
- Render one short shot before a long one, and look at it before rendering the rest.
- Ask for the price first and say no if it’s more than you meant to spend.
- When a shot is wrong, redo that one shot. Everything else stays.
Still stuck?
Making a whole film from a song? See the music video guide. Or ask on our Discord, or email justin@reveriemovies.com with a screenshot of the shot.
Go to your projects